How to Easily Resize Multiple Photos at Once Using Photoshop
However, if we have a blog page that displays a lot of photos, it would be nice if the photo file has a small size, so it will make it easier for the browser to load the photos.
Photos with large sizes will make the page take a long time to load. As a result the reader will feel lost time to find out what is contained in the article.
 |
| photo source :: google.com |
Resize photos can actually be done manually in Windows default applications, such as paint, but the resulting file is still fairly large.
Ideally, the size of the uploaded photo is around 100-150kb maximum.
For that we use the Photoshop application to resize photos, besides making it easier, the time used is also more efficient, we will also get a smaller photo file than similar photo editor applications.
In Photoshop, the term action feature is known which is useful for doing work at once automatically, so this time we use the action method (.atn).
So first we have to create an .atn file for photoshop and then load the photo file to resize. Here I use Photoshop cs 6 portable.
How to resize multiple photos at once using Photoshop
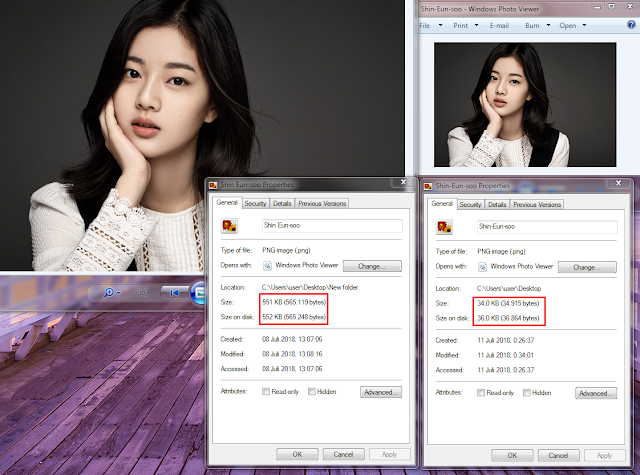
1. My previous photo file is 551kb with dimensions 712x488px

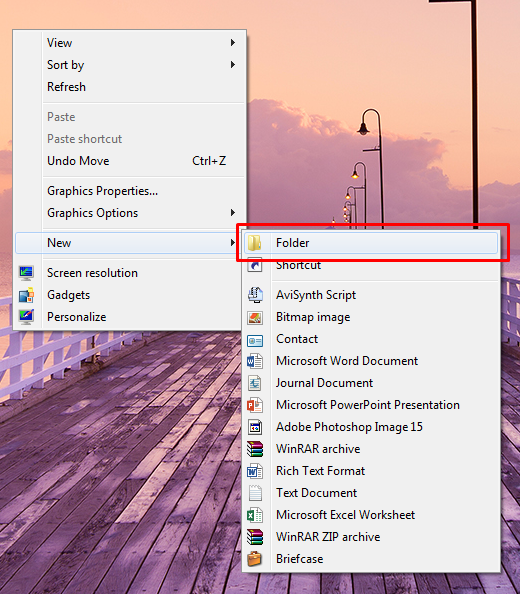
2. Create a new folder on the desktop. Then enter the photo to be resized into the folder
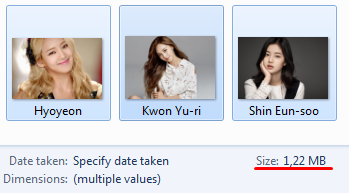
3. Here I give an example of 3 files with a total size of 1.2MB
4. Open only 1 photo file to be resized in Photoshop. Then click Windows>>Action

5. In the action window that appears at the bottom right, click Create new action

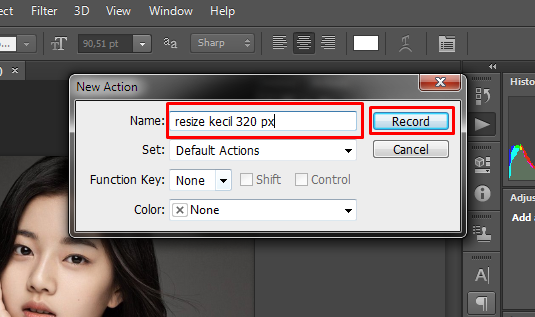
6. In the new action window write the name of the desired action and press Record
7. Photoshop will start recording all our activities in Photoshop, then click the Image menu>>Image Size or (atl+ctrl+i)
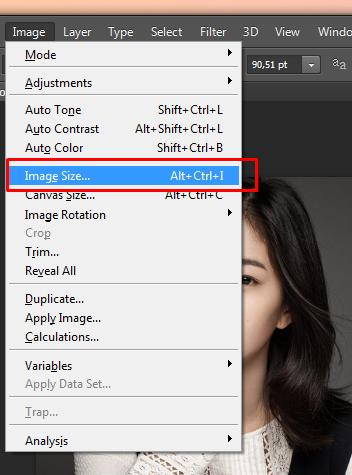
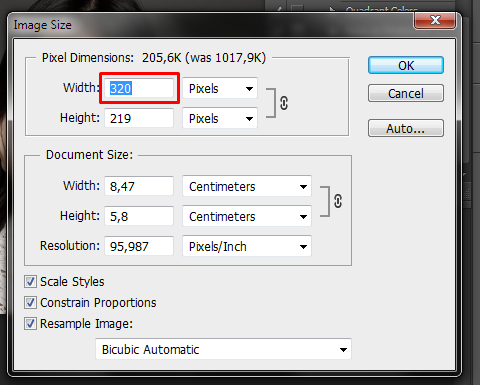
8. In the image size window, change the size of the desired file width. In this case I only changed the file width to 320 pixels. Then click OK.
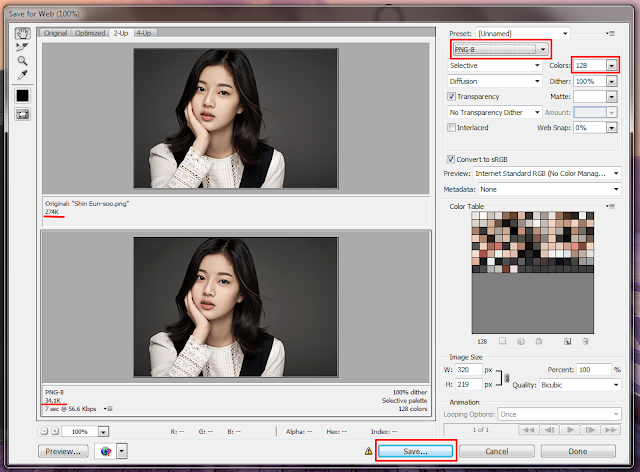
9. Next save the file, use the save for web option. Because we will use the photo file for the purposes of our blog. Click the File menu>>Save for web (alt+shift+ctrl+s)

10. In the Save for web window, select PNG-8 then Colors 128, you will see on the left side of the photo window the upper part is the original size and the lower part is the size you will get after the photo is saved. Click Save at the bottom.
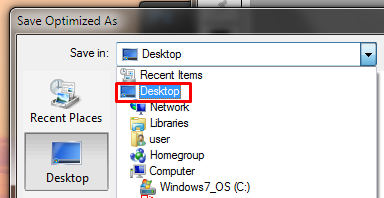
11. Photoshop will ask where the file will be saved, in this case I will save it on the desktop, so that it is easy to see, then click Save.
12. Once saved, return to the action window to stop the photoshop activity recording our activities until the last time we saved the file on the desktop, click Stop recording.
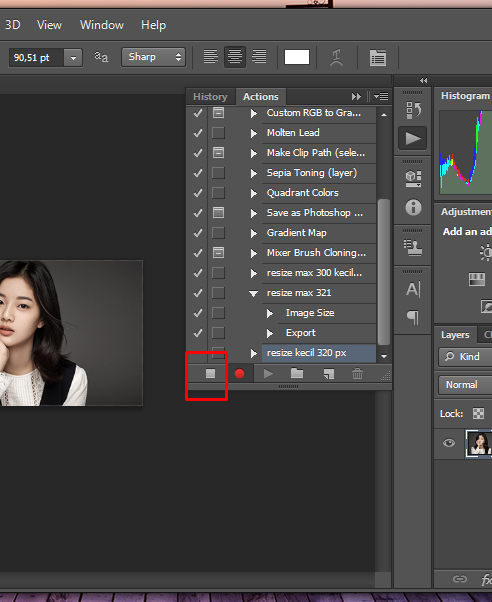
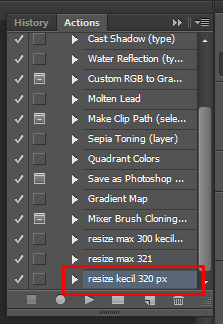
13. We will get our generated .atn file, which we will use automatically.
14. Next we will load the photo folder where we store the 3 photo files earlier. Click File>>Automate>>Batch.

15. Then follow the settings below. On the Choose button, select the file folder where the photos are stored. In this case I keep that folder on the desktop. After that click OK.
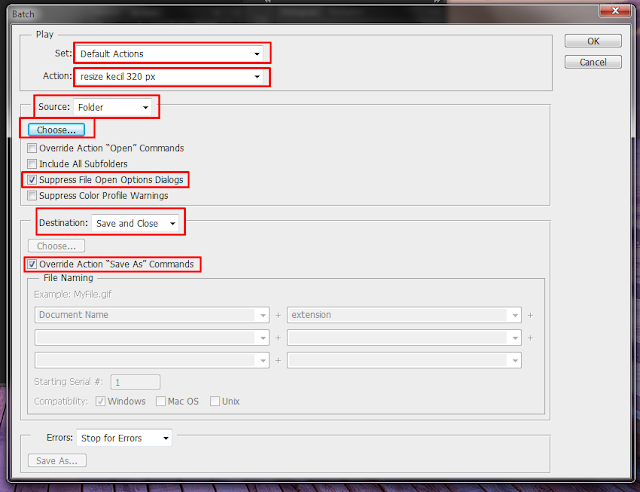
16. Then Photoshop will automatically resize and save the file from the folder earlier. And it will be saved automatically on the desktop as I saved the file when I recorded it.
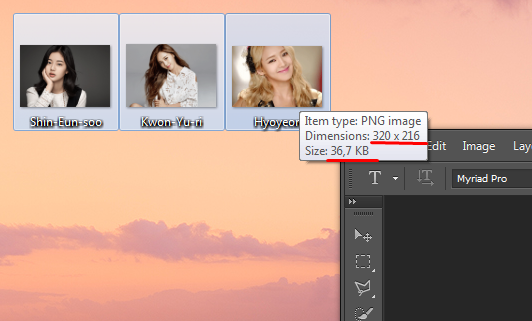
17. Done. You can see that my photo file, which was originally 551kb in size, has changed to only 34kb.
Keep in mind…
Actually when using PNG files on the website, it will make loading a bit heavy. Because PNG has a larger size than JPG.
The best advice is to use only JPG photo files. This tutorial is only as an example.
okay..
How is the tutorial above, easy isn’t it?
This multi-photo resizing tutorial does not only apply to blog needs.
For those of you who want to resize a lot of the photos you have automatically, you can use this method by changing certain parameters.
Hopefully this tutorial is useful and please share it with your friends.
Post a Comment for "How to Easily Resize Multiple Photos at Once Using Photoshop"