How to Create Shadows on Photos in Photoshop
Want to know how to create shadows in Photoshop?
Do you want to make your photos more realistic with shadows on your photos?
Well, on this occasion, we will show you how to create shadows using Photoshop.
How to Create Shadows on Photos in Photoshop
How to create shadows with Photoshop is intended for those of you who want to edit photos as if you were outdoors even though you were taking photos indoors.
The steps are very easy. All you need to do is follow it carefully and carefully while doing it.
How to Create Shadows in Photoshop
Here we will use an image that has been used in the previous tutorial, namely tutoiral How to Merge Two Images in Photoshop.
For how to create shadows in Photoshop, try the following steps:
1. Open the Photoshop application on your computer or laptop, then select the photo you want to create the shadow for.
The tip is to use two different photos, make sure that the Background and Object (which will be shadowed) are on different layers.

2. Next, click the layer of the object that you want to give a shadow, at the very bottom click the icon that says fx.

3. Then Select Drop Shadow to add shadow to the image you selected earlier.

4. Then without changing the configuration on the drop shadow, just click OK.
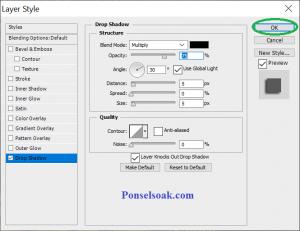
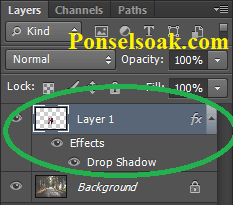
5. Then the Effects layer will appear on the object as in the example below.
But we cannot edit the shadow on an image if it is still in the object layer, so the shadow needs to be made a separate layer.
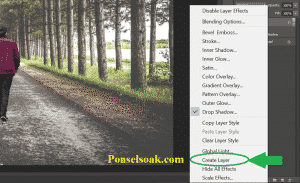
6. Then right click on Effects which is below the Layer object. Then Select Create Layer.
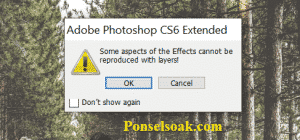
7. Click OK if suddenly a pop up appears in your Photoshop, if not, go to the next step.
8. The shadow is still not visible, so we can change the direction of the shadow as we want by pressing CTRL+T.
Then a box will appear like the example image below. And don’t forget when pressing CTRL+T, make sure that the Shadow Layer is active.

9. Next, drag the shadow in the direction you want, whether forward, backward, sideways, and so on.

10. Then so that the shadow looks more natural, it is better for us to give a Blur effect to the shadow that we made earlier.
The trick is to click Filter > Blur > Gaussian Blur.
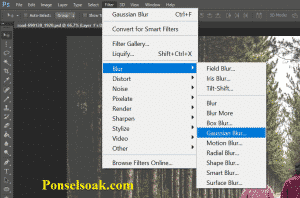
11. Set how much you want your image to be Blur.
If you think it fits what you want then you can click OK.

12. Next you can adjust the transparency / Opacity of the shadow, Click the arrow next to Opacity, then drag it until the shadow looks more natural.

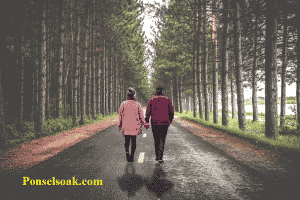
13. This is the result of the final image that has been shadowed.
Save the shadowed image by clicking Save As, giving it a name, and selecting the file type you want.
That’s a tutorial on how to make a shadow on your image or photo using Photoshop.
Hopefully the tutorial above can help you in the Photoshop world in the future.
Those are some of the ways you can do it for friends create shadows in Photoshop easily and quickly.
I hope tutorial How to Create Shadows in Photoshop this can help all of you.
Please also share this article on your social media. Good luck!
Look forward to more Photoshop tutorials, see you later.
Post a Comment for "How to Create Shadows on Photos in Photoshop"