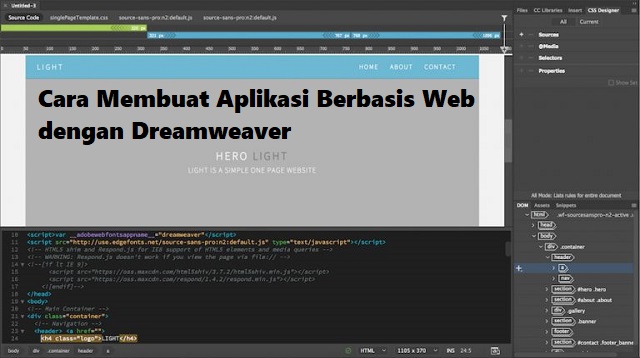
How to Create a Web-Based Application with Dreamweaver 2021
How to Create Web Based Applications with Dreamweaver – Adobe Dreamweaver CC is a popular website builder and web deploy tool.
The Dreamweaver application is considered a perfect blend of WYSIWYG and HTML editor which is more conventional.
Dreamweaver was first developed by Macromedia, but was later acquired by Adobe Inc. in 2005.
At first Dreamweaver offered a perpetual license, a once-in-a-lifetime payment method for running this software.
But now Dreamweaver is switching to a subscription-based service which uses the Adobe Creative Cloud structure.
Maybe using this Dreamweaver for the first time must be very difficult.
However, don’t worry because in this article we will review how to create a web-based application with Dreamweaver, so stay tuned for this review to the end.
How to Create Web-Based Applications with Dreamweaver
1. How to Create a Web-Based Application with Dreamweaver by Creating a New Site
 |
| How to Create a Web-Based Application with Dreamweaver by Creating a New Site |
Then you name the website as you wish and save it in one folder.
This method can help you manage files and make it easier for you to do the upload process later.
If you want to add an image to your site, then click “Advanced Settings > Local Info” so that the images folder will be created in the sites folder.
2. How to Create a Web-Based Application with Dreamweaver by Creating a Homepage File
 |
| How to Create a Web-Based Application with Dreamweaver by Creating a Homepage File |
You will find the site files in the upper right panel so you can create a homepage from scratch.
The first step, please open the menu “File > New“then select”New Document“After that select”HTML” as document type then click “Create“.
Then save the HTML file as index.html, and place it in the site’s folder.
3. How to Create a Web-Based Application with Dreamweaver by Creating a Header
 |
| How to Create Web-Based Applications with Dreamweaver by Creating Headers |
Usually the header will be filled with your logo and site name, click the white page or select a specific section with the “Body” to the editor.
After that press “Insert” which is at the top right of the panel so it will display a list of common HTML elements that can be added to your page.
After that you can search for Header elements by dragging and dropping them onto your worksheet so that they will be added to your website along with the code.
4. How to Create a Web-Based Application with Dreamweaver by Adding Home Navigation
 |
| How to Create Web Based Applications with Dreamweaver by Adding Home Navigation |
Now go to the menu “Insert Panel” and search for elements “Navigation” so a window will appear then write “Navigation” as ID and click “OK“.
This method will add a navigation element to the editor when you are on the content element look for Hyperlink in the Insert panel then click and fill in the details.
When finished, click “OK“then click the button”Home” has more lines of code in the editor.
5. How to Create a Web-Based Application with Dreamweaver by Adding a Website Description
 |
| How to Create a Web-Based Application with Dreamweaver by Adding a Website Description |
You can add bullet points by using the line below the code paragraph and then opening the Insert pane and clicking “Unordered List“.
Pass tags on “
In the HTML list, you have to add some tags manually according to the number of points.
If you have succeeded in creating the basic structure of the homepage, you can also add some other content such as forms, videos, images, and others.
6. How to Create a Web-Based Application with Dreamweaver by Creating a CSS File
 |
| How to Create a Web-Based Application with Dreamweaver by Creating a CSS File |
Cascading Style Sheets (CSS) are used to modify elements in HTML and will always be used by developers when creating websites.
First of all, please give your header an ID by hovering the cursor to the bottom right of the Dreamweaver panel and then selecting “panel”DOM“.
Then press “header” so that it is marked with a blue color along with a plus sign as well as a label.
Then click the plus sign and type “#headers” with the hashtag assigning the ID to the element.
After that press return or enter, on the next menu select source “Create a New CSS file“.
A new window will appear and select Browser locate your site folder by typing “style.css” and then click “Save” and “OK“.
You’ll have a new style.css appear above the live view and a new link element in the code editor.
7. How to Create a Web-Based Application with Dreamweaver by Creating a CSS Title Selector for Website Title
 |
| How to Create a Web-Based Application with Dreamweaver by Creating a CSS Title Selector for Website Title |
The first step is to mark H1 under the header of the DOM panel and select “CSS Designer” from the panel.
Then click the plus sign “+” behind Selectors then the name #header h1 will automatically appear, after that press “return“.
The final word
That’s our entire discussion about how to create a web application with Dreamweaver that we can share with you.
This discussion is for informational purposes only to increase your knowledge about Dreamweaver.
If this information is useful for you, don’t forget to share it with your friends or relatives.
This is the information we can share with you about how to create a web-based application with Dreamweaver in this article. Hopefully useful and good luck.

Post a Comment for "How to Create a Web-Based Application with Dreamweaver 2021"